Intro: What Are Team Members? #
In the PathPro ecosystem, the Team Member role is for anyone you’d like to invite to manage a project.
What Can a Team Member Do? #
- After being invited to a project, team members will be provided the ability to..
- Be assigned to any given task on a project’s roadmap
- Engage with community members through PathPro’s commenting system
- Release product Release notes.
- Add/edit all aspects of a project they’ve been invited to, excluding payment details
- Receive notifications when users make new comments on a project
- Edit the Project’s settings, such as building a custom header, or changing the project’s core labels in the settings area
- Ban community members from a project
Essentially, a Team Member can be assigned the same level of access as the main admin, EXCLUDING access to any payment details.
Who are Team Members? #
Well, anyone you like of course, but typically they are internal business associates, developers, tech support agents, and other individuals who you’d like to manage your product, or otherwise engage with your customers.
What’s the Difference between a Team Member and a Community Member? #
There are very important differences between these roles. The Community Member is typically a customer who has joined the project via its front-facing view on your website. Community Members have read-only access to all aspects of a project, and can vote, add comments, and otherwise engage with various sections. Team Members on the other hand have admin-level access to the project, and are able to edit all settings accordingly. In summary:
Community Members = public users such as customers, clients, etc.
Team Members = Developers, tech support agents, and other internal roles that have full editing access to any given project.
How do I invite Team Members to a Project? #
After you have created at least one project, you can then invite Team Members in 2 ways:
1. Invite the Team Member in the Project Settings.
While creating/editing a project, you will find a section titled “Add or Edit Team Members / Collaborators”. All previously added team Member roles will appear here, and you can add them as needed. This will automatically send an invite to the Team Members so they can join the project.
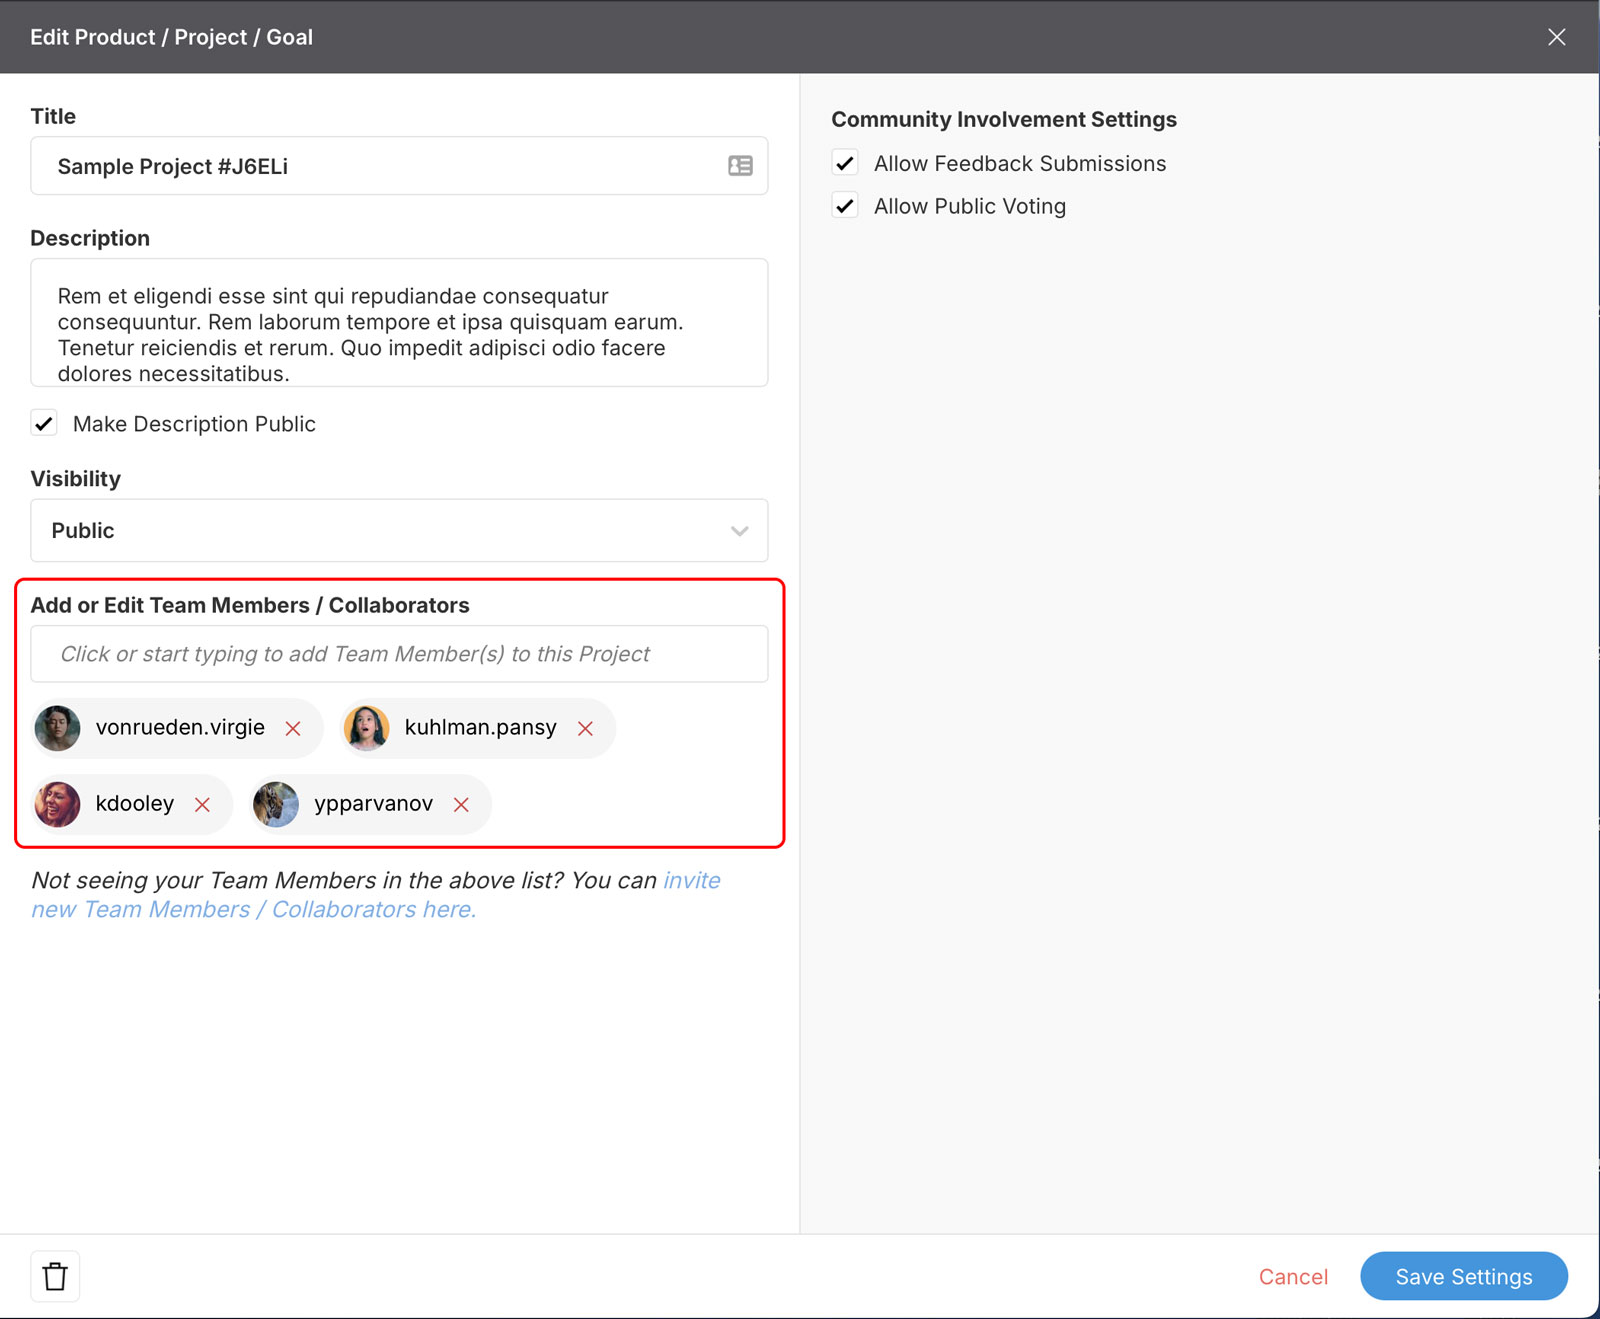
Note that this list will only appear after you’ve created a project and previously invited Team Members. When creating your first project, or if no Team Members have been added previously, you will need to invite team members using option 2 below.
2. Invite the Team member from the dedicated Team Members section of your admin area.
After creating a project, you can easily assign Team Members to that project by navigating to the Team Member panel of your account’s admin. This section is located in the lower left of the admin toolbar, as shown below:
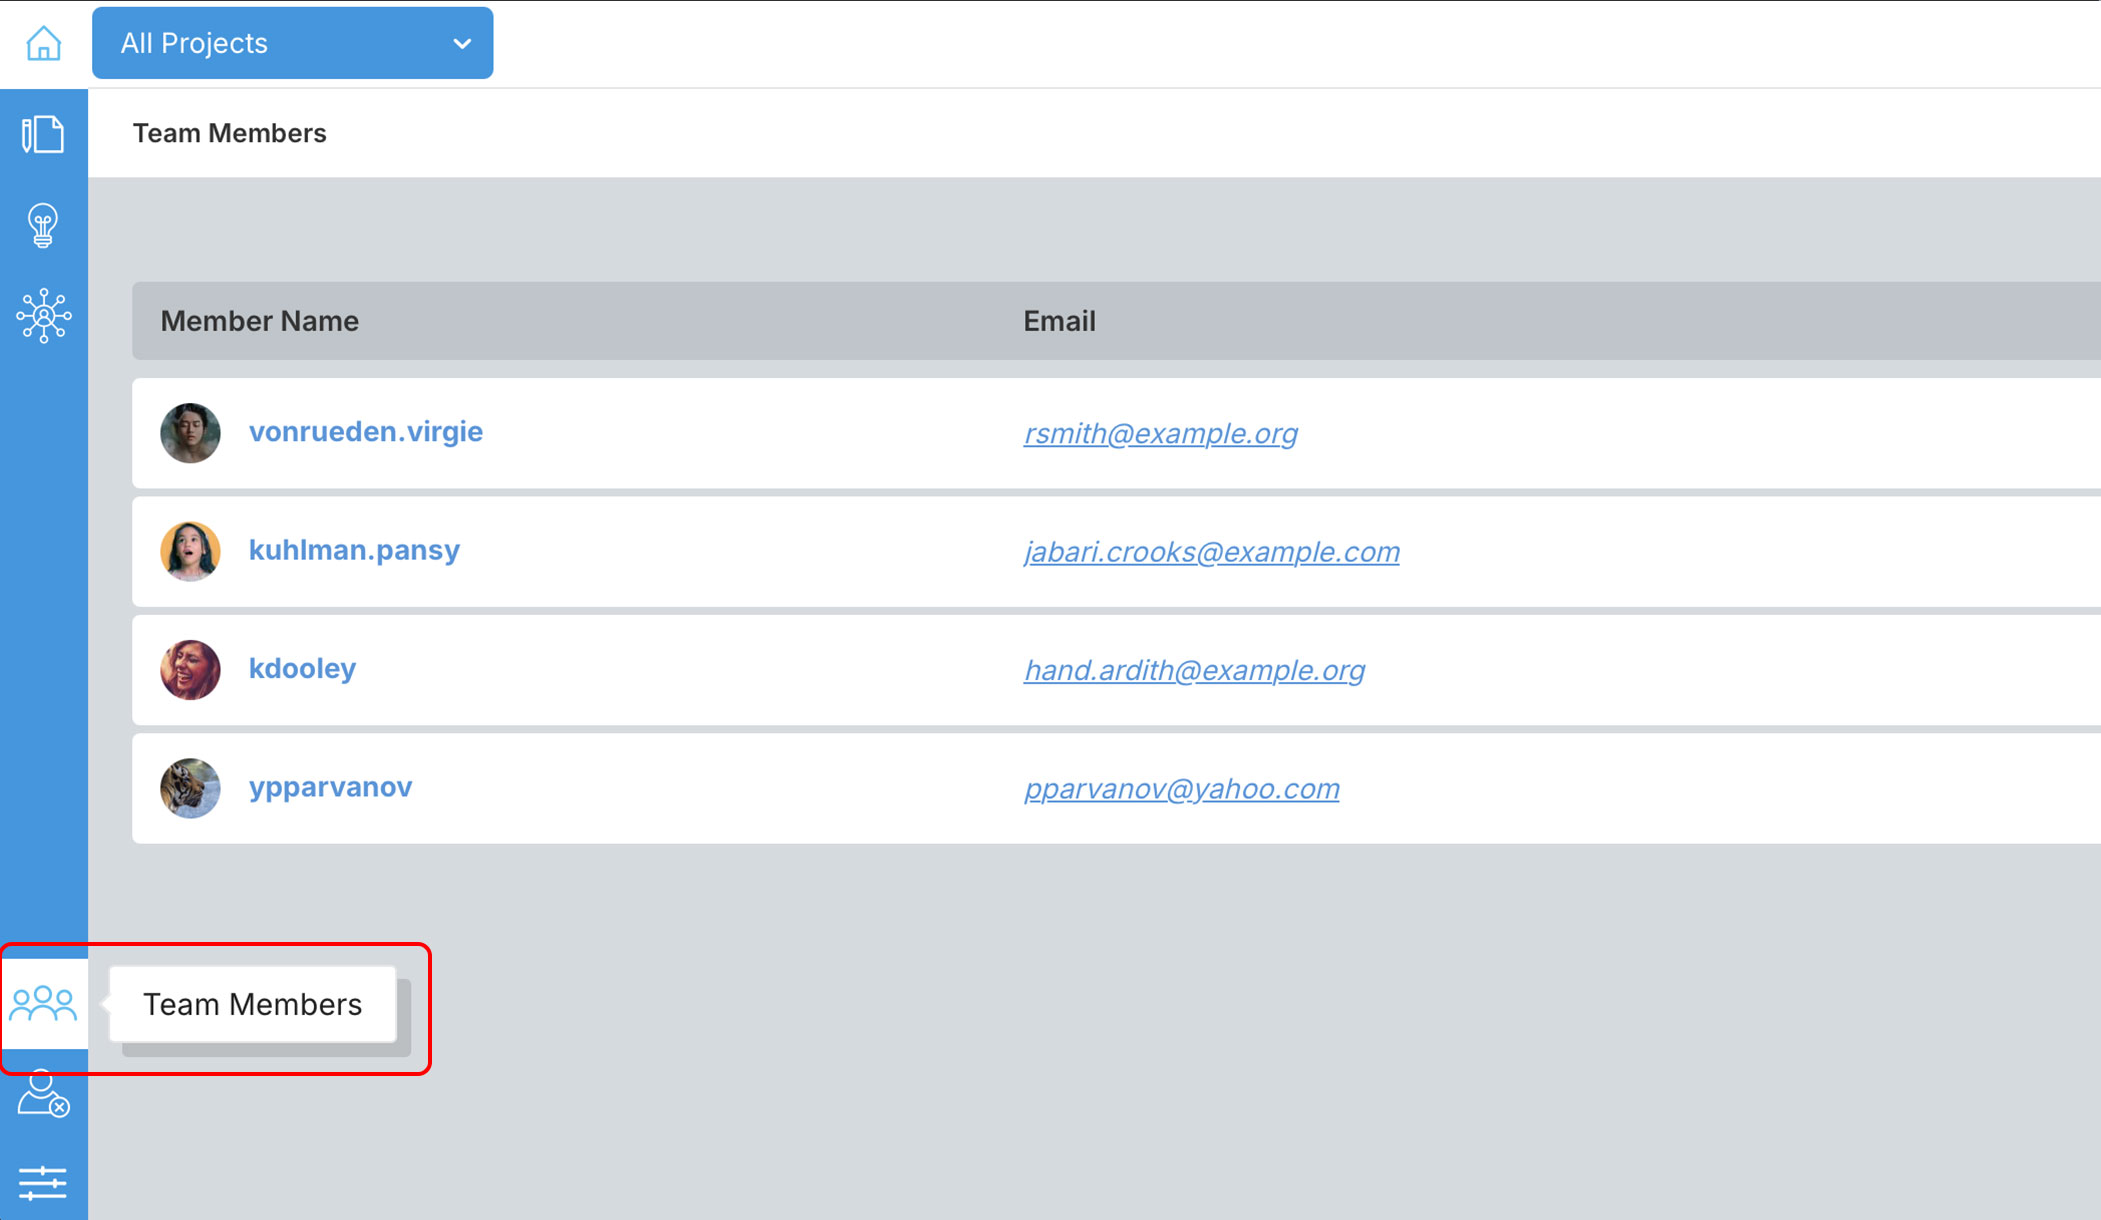
From within the Team Members area, you’ll see a list of all existing Team Members, and you can filter them by selecting a project from the project dropdown in the top left of the admin area. You can also edit the details of any Team Member by clicking on the Team Member’s settings icon (more on that later).
To invite a new Team Member from this section, simply click the “Add New” icon in the top right:
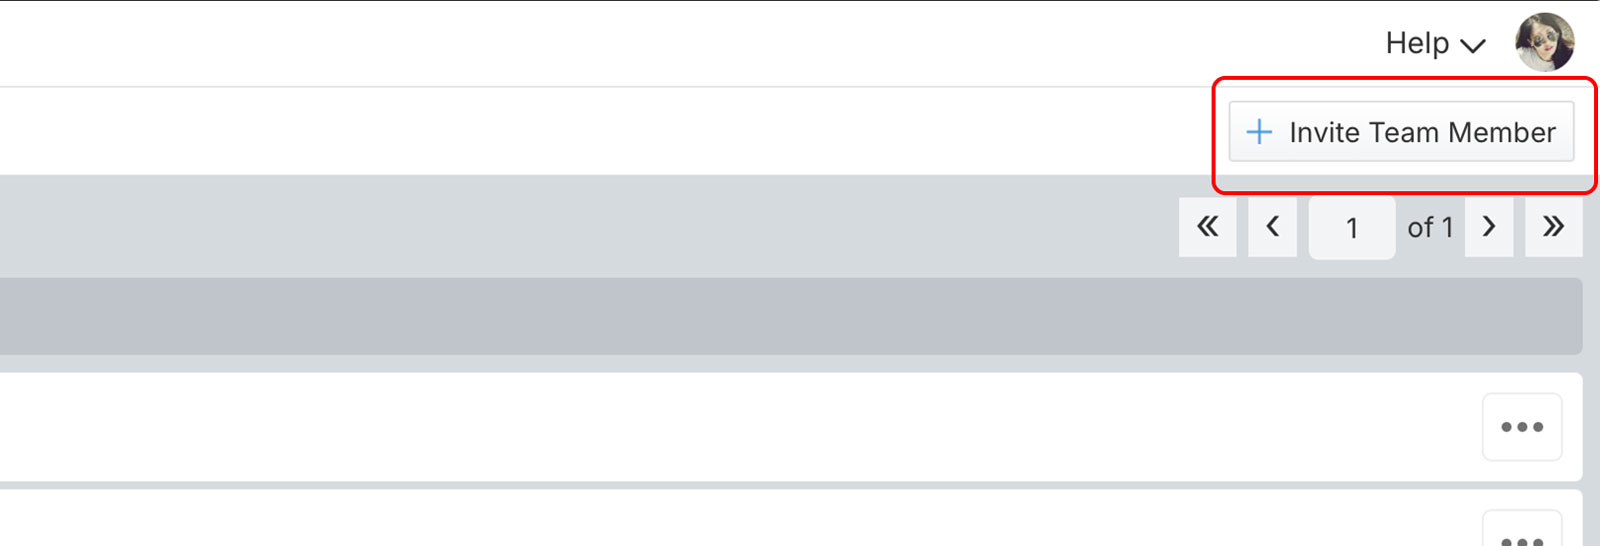
You’ll then see a panel with options to invite the team member via email, while also being able to assign them to any project you’ve created. You’ll simply enter the email of any new Team Member you’d like to add to your projects, select the project(s) you’d like them to be assigned to, and include an optional personalized message.
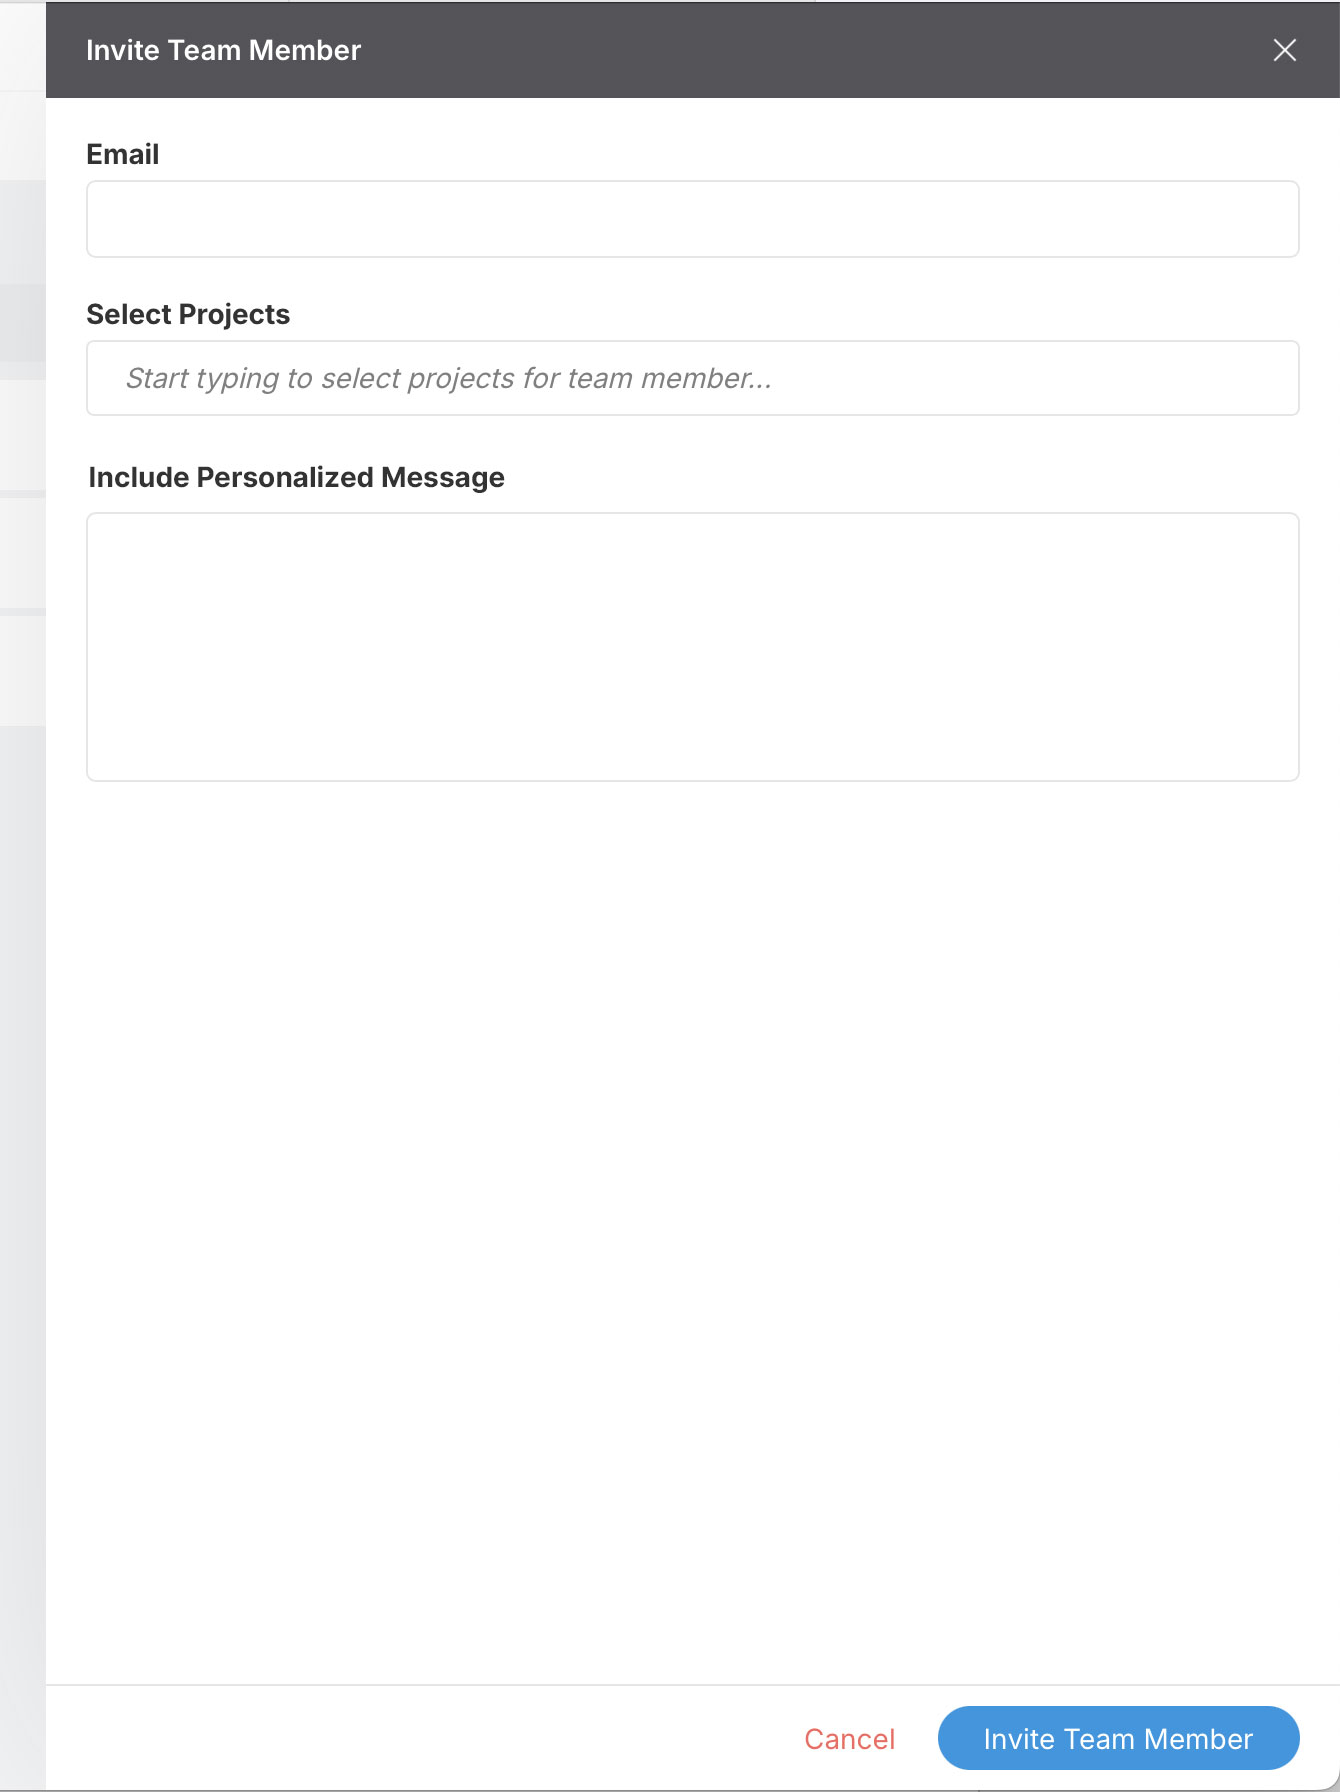
Once everything looks good, simply click “Invite Team Member” button and the invitation will be sent! After the user then accepts the invite, they’ll officially be granted access to any projects you’ve invited them to. This means you’ll then be able to assign them to tasks, and grant them permissions as outlined above in the section titled “What Can a team Member Do?”.
How do I assign Tasks to a Team Member? #
After a Team Member accepts an invite to a project, you can then assign them to any task. This automatically subscribes the team member to notifications for any given task, and essentially puts them in charge of a task. This is done by going to a project’s roadmap, and either selecting an existing task, or creating a new one (find out more about creating a task here). This will bring up the Task’s settings panel, where you’ll then see a section titled “Assign to Team Member(s)” as shown below:
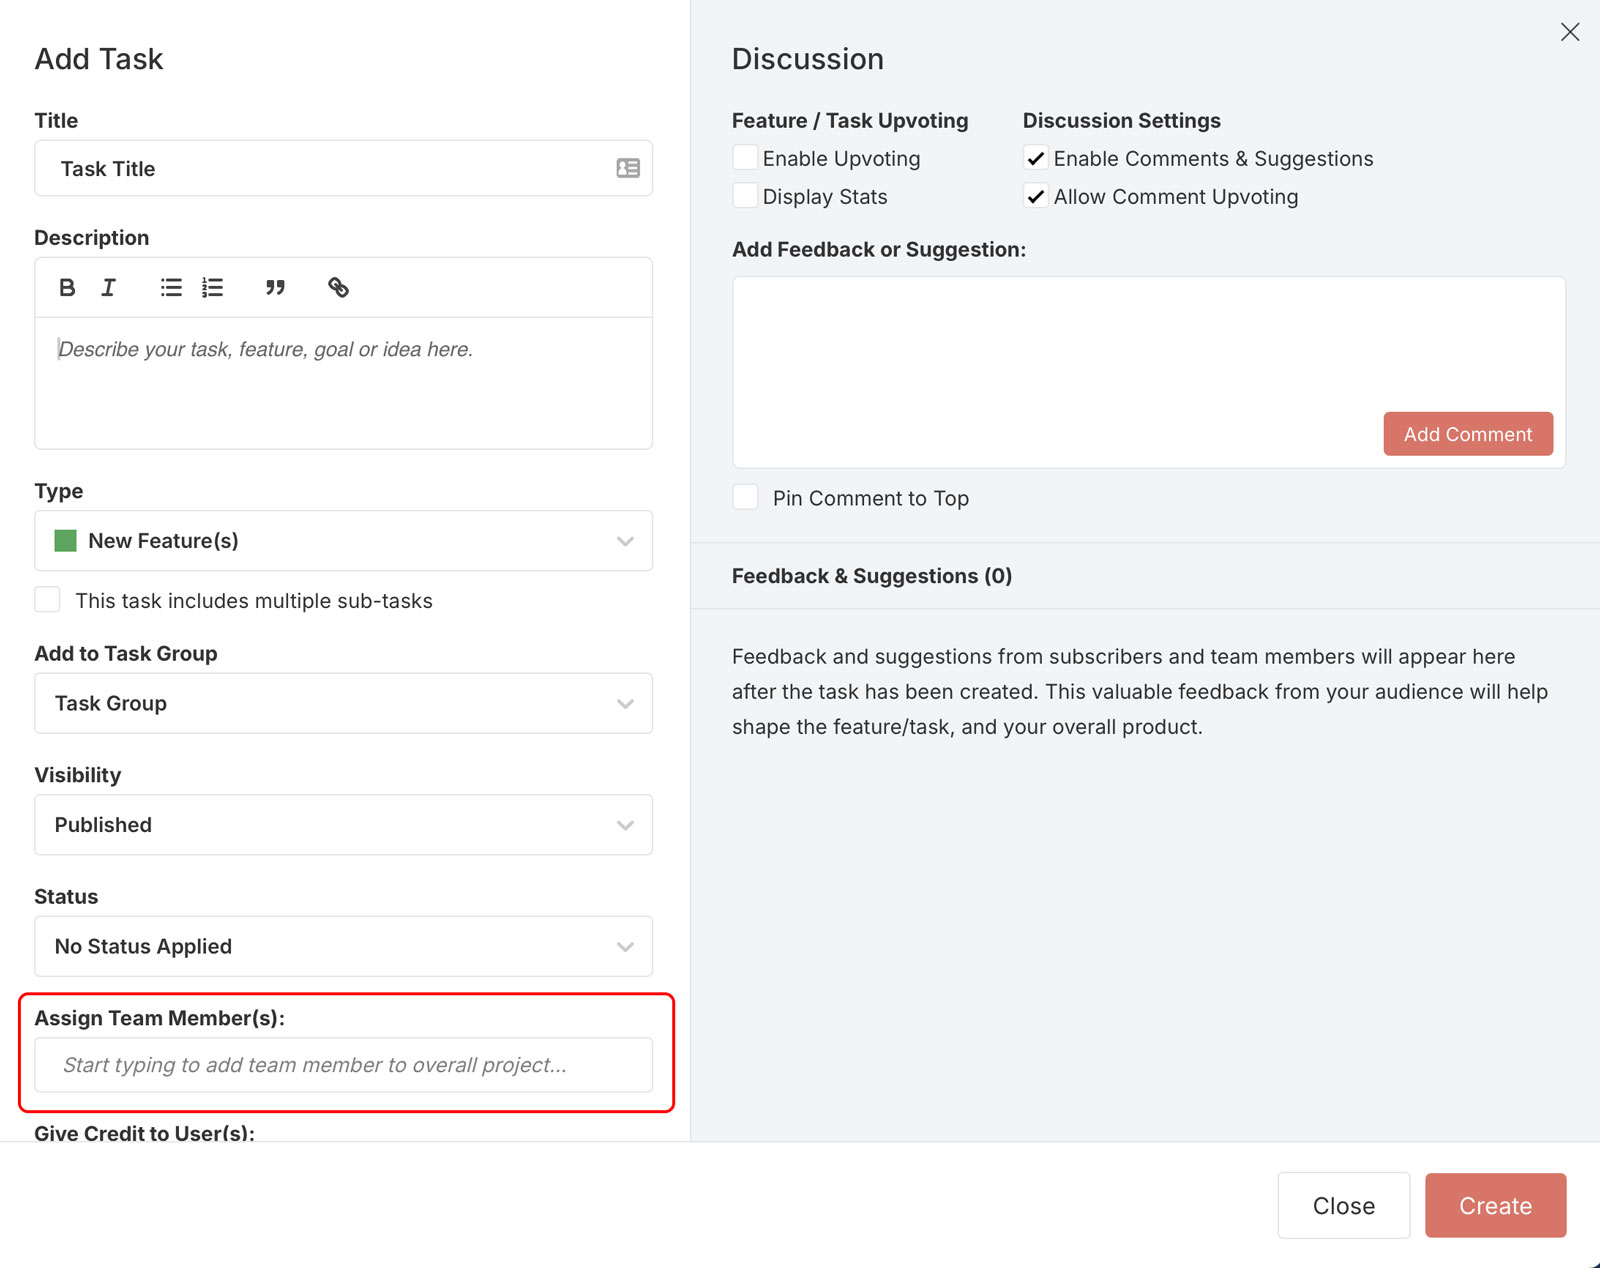 After clicking this field, you’ll see a list of Team Members that you’ve invited to the project. Simply select the Team Member you’d like to assign the task to, then click Save (or “Create” when creating a new project) and that’s it! The team member is now officially assigned to the task!
Team Member Settings & Permissions #
Back on the Team Members section, you’ll see the list of Team Members, and you can click through to view their settings by clicking the small “…” icon to the right of the Team Member entry, as shown below:
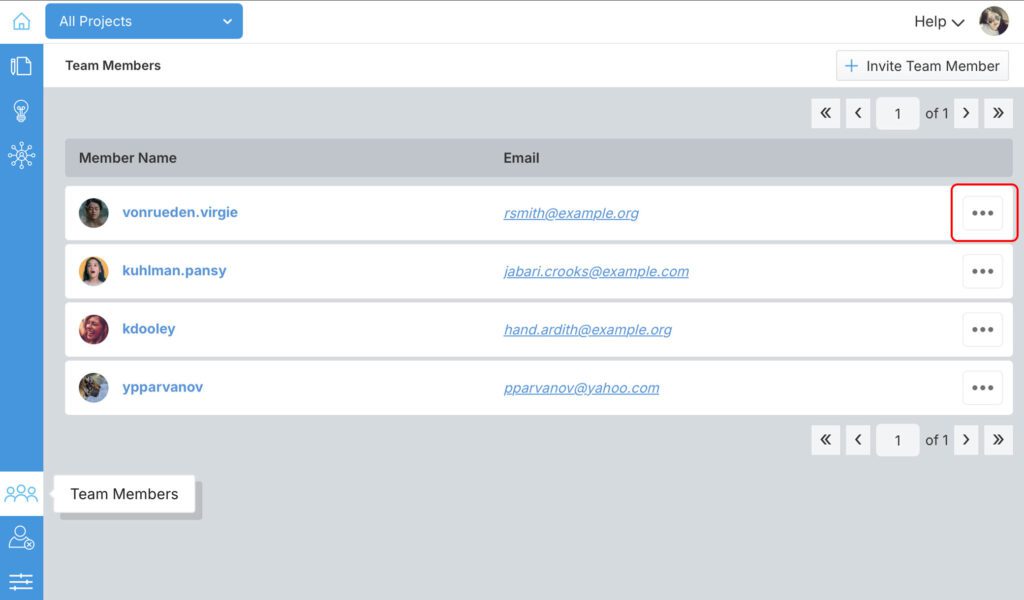
After clicking this option, you’ll see a full overview of the Team Member, which we’ve outlined below:
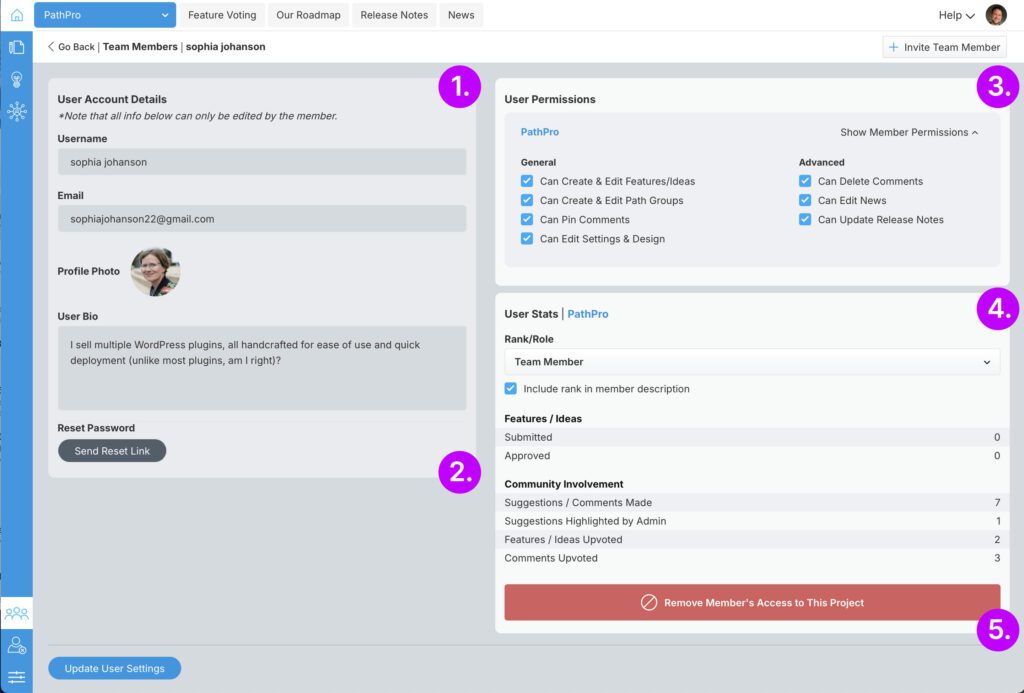
- The Team Members biography and user details.
- The option to send the member a Password Reset.
- Misc. User Permissions assigned to the Team Member under the selected project
- Overall interactions and rank for the Team Member in regards to the selected project.
- The option to remove the member from the selected project
Note that you must select a project in the Project election dropdown in order to edit a user’s settings, as permissions are project-specific. This means the Team Member may have different permissions assigned on one project versus another. If you have not selected a project from the list, you will see global options only, as well as a collection of stats across ALL projects. The following example showcases the user’s settings as it relates to a specific project.
Summary #
That covers the basics of the Team Member Role!

