Intro: What is the Ban Member Feature? #
Look, for the most part customers are civil, easy going, and ready to provide productive feedback. But sometimes there are a few bad eggs, whether someone is looking to spam your comments, or if an irate customer is wreaking havoc on your community’s good vibes. To each their own of course, but sometimes you need to prevent a user from access your project, and that’s where the Ban Member feature comes in.
By Banning a member, you not only remove their access form a project, but you essentially lock them out of the project indefinitely. This means they can no longer join your products community, and can no longer interact with your project overall (no upvoting, commenting, and so on).
How Can I Ban a Community Member? #
To ban a community member, you’ll first need to remove them from a project, and that means locating the project you’d like to remove them from. Here’s how:
First, you’ll want to navigate to the “Community Members” section of the admin area, by clicking the icon shown below:
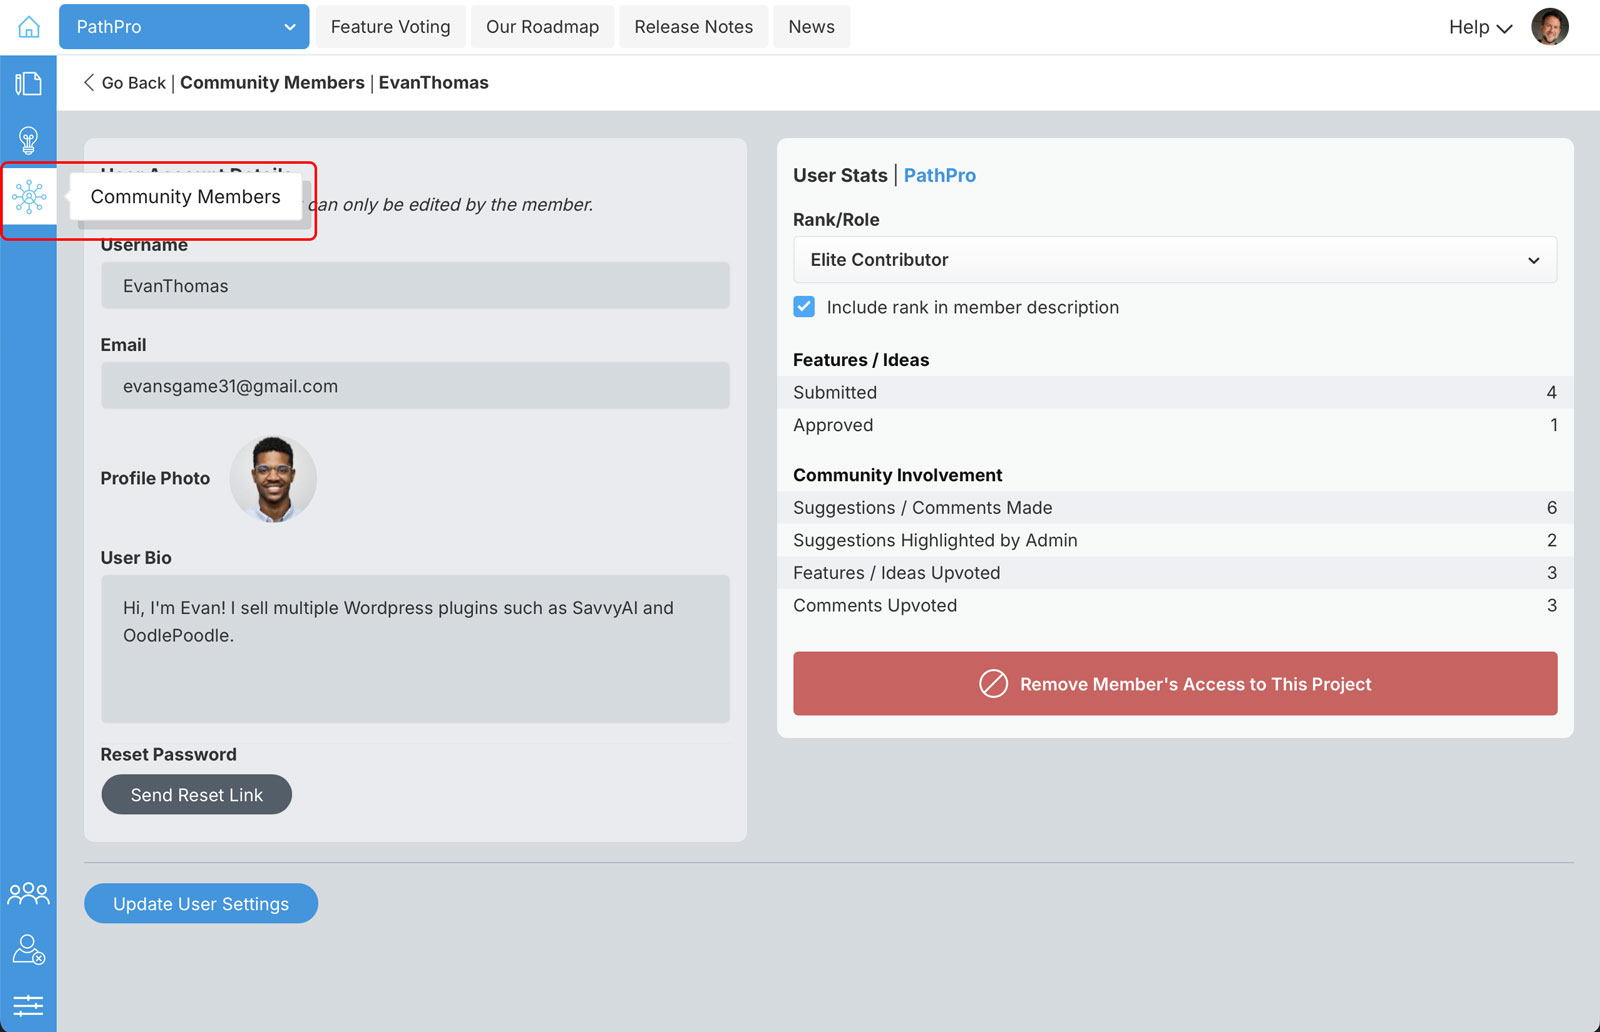
Next, you’ll want to make sure you select the correct project from the project dropdown in the top left of the admin area. This will filter the list of community members to display only those associated with the selected project. In the example below we have selected “PathPro” as the project, and we are using the member “EvanThomas” for our example (don’t worry, he’s given us permission and is not actually being banned 😉
After you’ve found the member you’d like to ban, you’ll want to click the settings icon, as shown below:
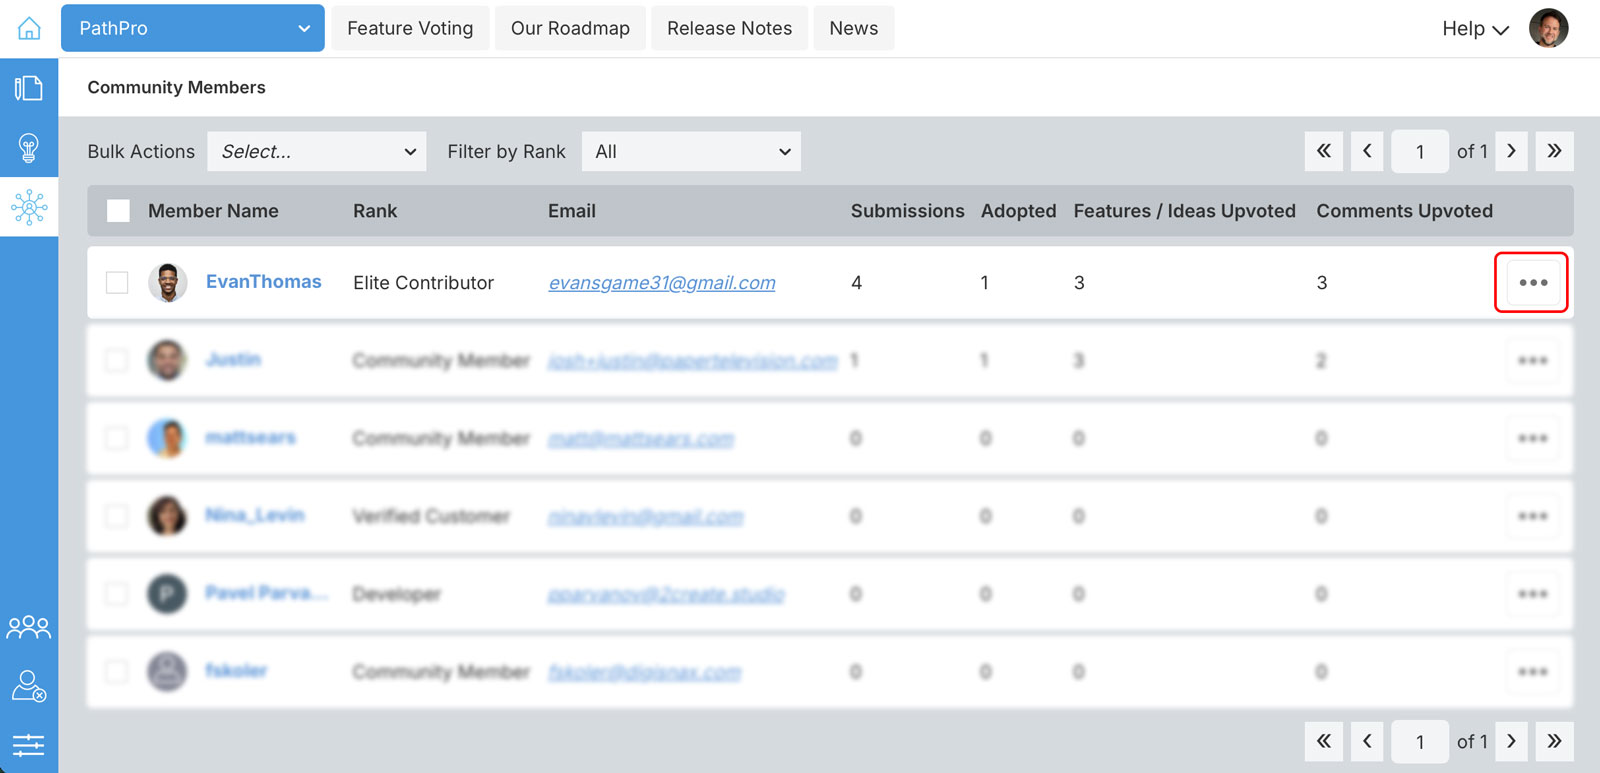
This will take you to the member’s account detail page. You can find out more about the Community Member role here, but for the sake of this article, let’s focus on the button titled “Remove Member’s Access to This Project”, as indicated below:
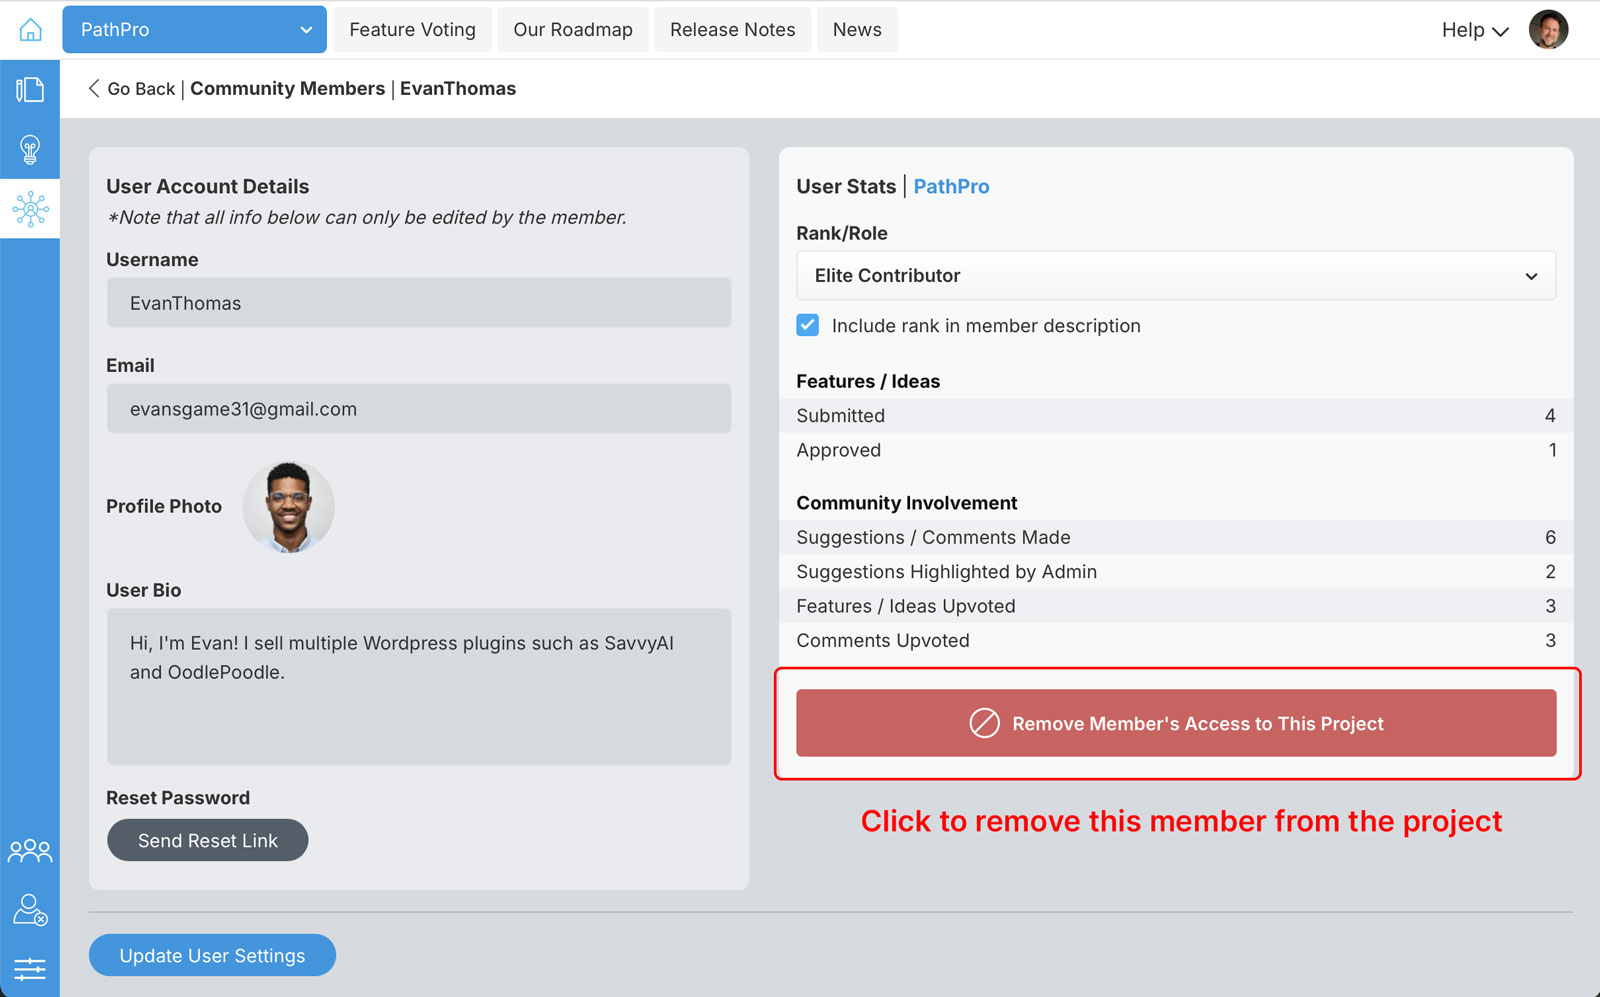
After you click this button, a popup confirmation will appear, and you will be given a few options, as shown below:
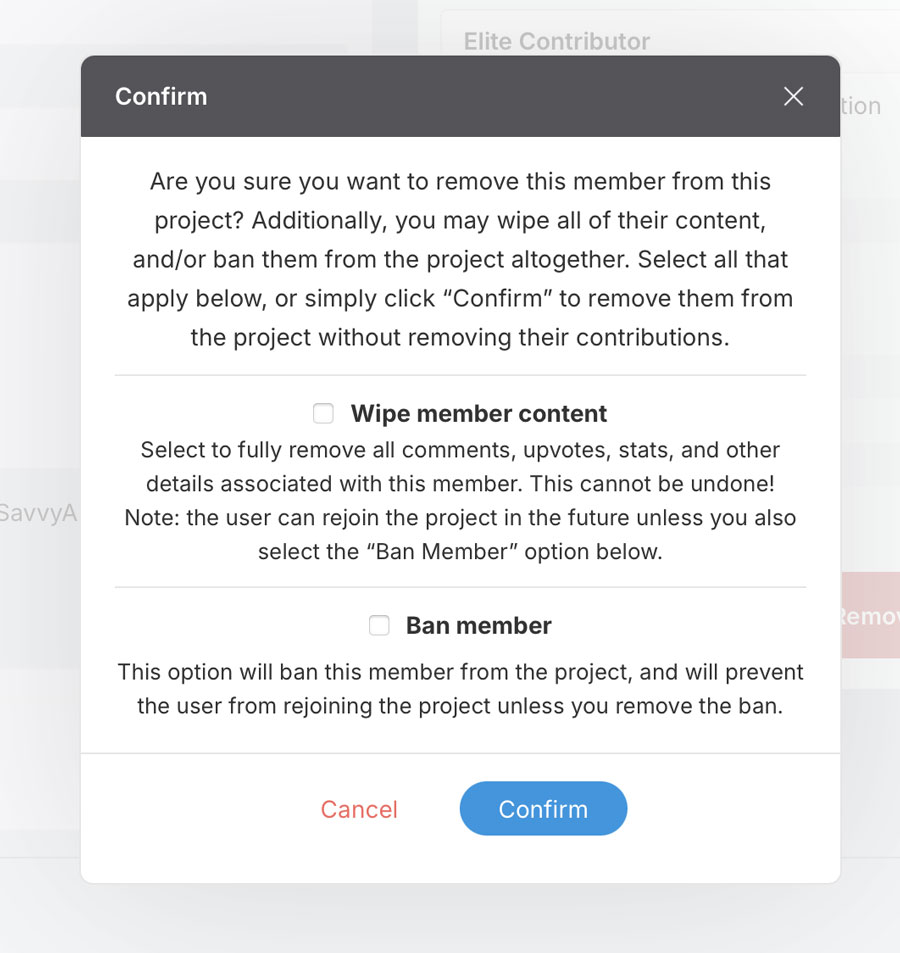
As you can see, you have the following options:
Click Confirm Button to Remove the Member from Project: This simply removes the member without any further actions. This is done by not selecting any other options, and simply clicking the “Confirm” button. All content previously submitted by the Member will remain, and they can rejoin the project anytime they like.
Additional Options:
Wipe Member Content: This will both remove the member from the project and permanently delete any contributions they’ve made, such as upvotes, submissions, and comments. This may be useful if the member has submitted inappropriate content, or if they have requested that their contributions be removed. Note if you select only this option that the member will not be banned, and they can rejoin the project at any point in the future.
Ban Member: Selecting this option will also ban the member from the project entirely, meaning they will no longer be able to join the product / project in the future unless you remove them from the Banned Member’s list. Note that you MUST select this option to ensure the member can no longer access this project.
When banning a member, we highly suggest that you select both options in the confirmation popup. Once you’ve done so, click “Confirm” button to add the member to the Banned Members list.
How do I access the Banned Member List? #
All banned members are neatly organized in a dedicated section of your PathPro account. To access this list, simply click the icon as indicated below:
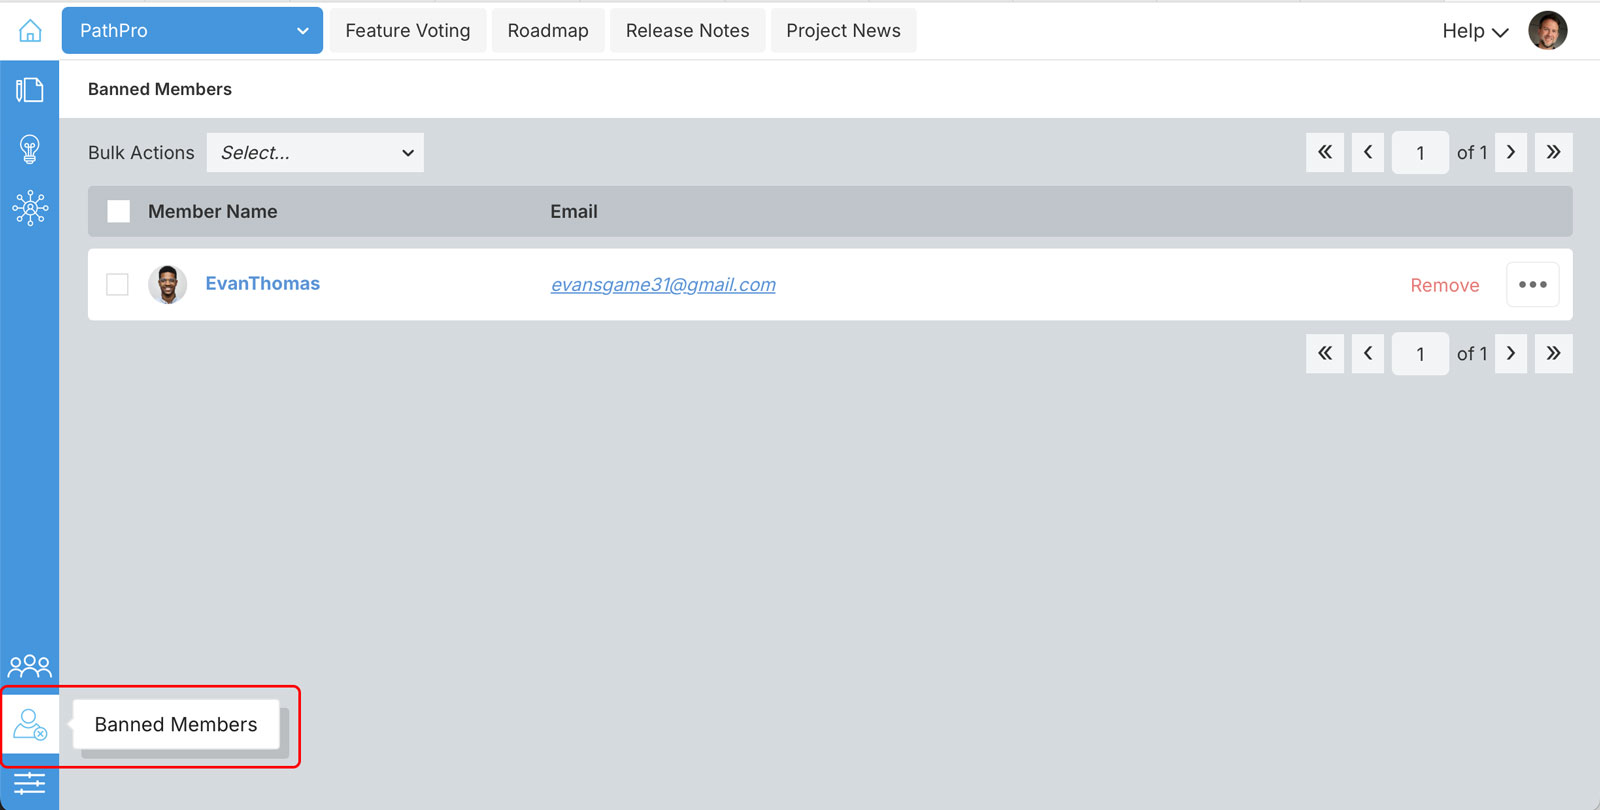
As you’ll see in the above example, our little troublemaker, EvanThomas, has been given a time out, and is now listed as a banned member. Also note that we have selected the project titled “PathPro”, so this serves as a filter, but you can also select “All Projects” from this dropdown to show every banned member across all of your projects.
How do I restore a Member’s Access to a Project? #
If you ever want to remove a member form the banned list, you’ll simply click the “…” icon on the right side of the member’s entry in the list view of the Banned Member section. Clicking that option will take you to this member’s profile in regards to the specific project you’ve selected in the project dropdown, and you’ll see the following iteration of the member details page:
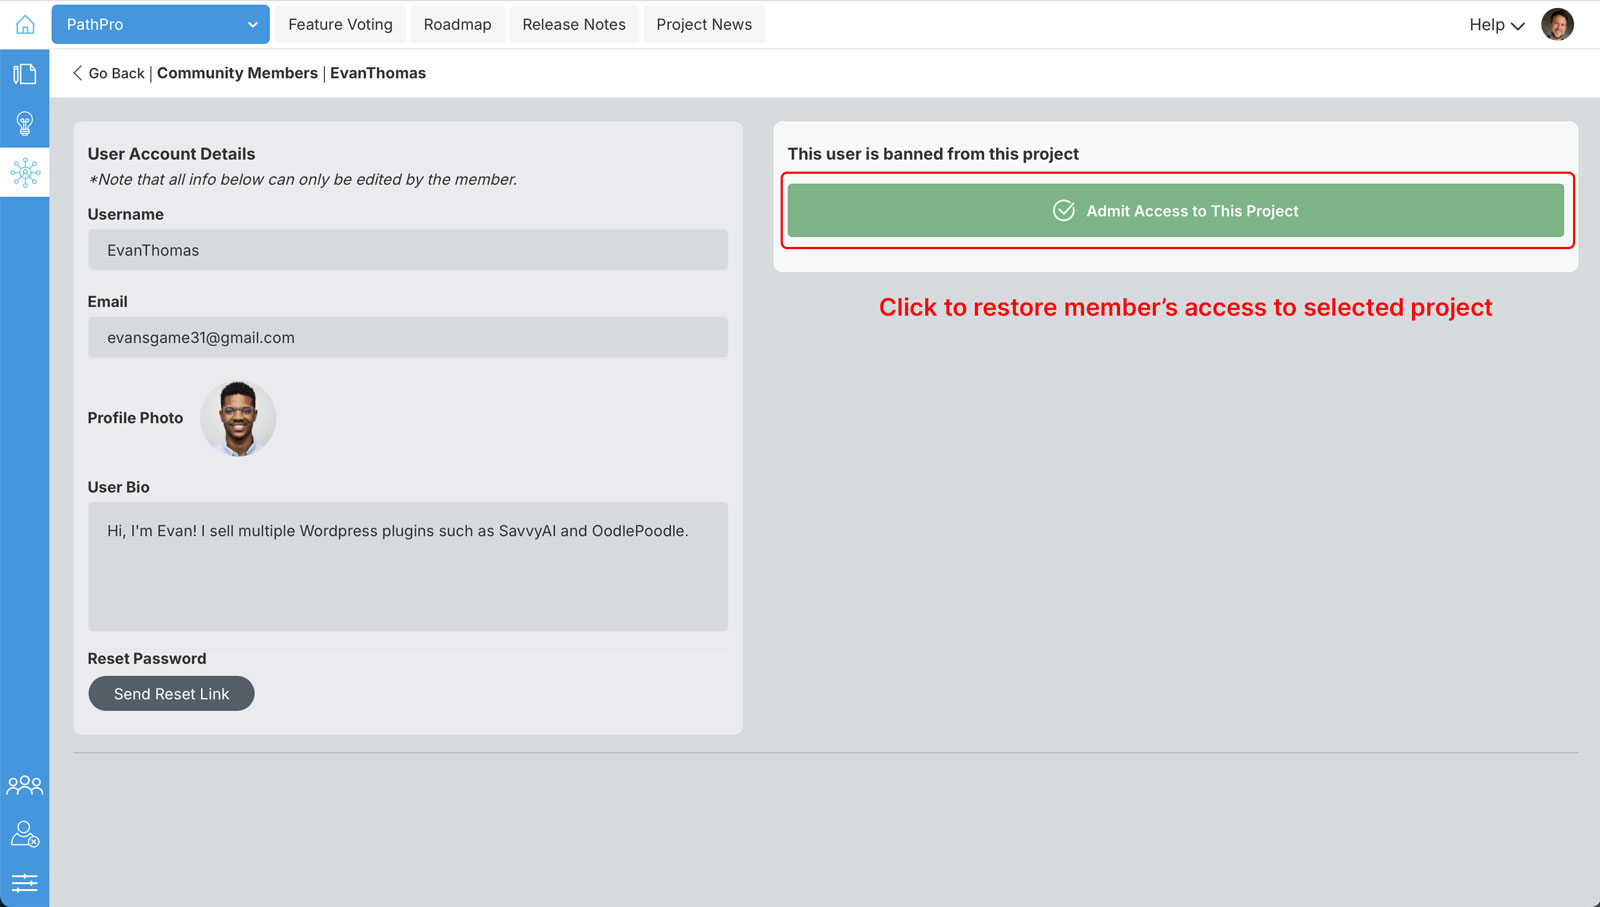
As shown above, to restore this member’s access to the project, simply click the green “Admit Access to This Project” button. You’ll then see a quick confirmation popup, and you’ll want to click the confirm button here as well to finalize the action:
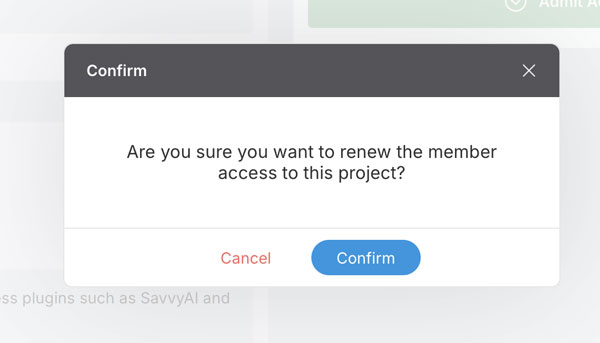
Note: Restoring a member’s access to a project will not automatically add the member back to the project, but will allow them to rejoin the project if they choose to do so.
Summary #
We hope it never comes to it, but you now know how to ban a troublesome member from accessing your project! Curious to find out how the Community Member’s role works? Check out this article.

