Intro: What Are Custom Domains? #
PathPro allows you to assign a custom domain of your choosing for each project. This allows you to use any domain you like (so long as you have access to the domain’s host). The main benefit of a custom domain is that it lets you place any project within your website’s ecosystem in a seamless manner, with no mention of the PathPro brand to be found. It is a fundamental aspect of the white-labeling process for our higher-tier members, and offers an extreme amount of flexibility as you integrate your PathPro projects into their proper websites. Below we’ll go over the critical items needed when setting a custom domain for any PathPro Project.
Note: The below instructions must be followed correctly to prevent any delays or errors while setting your custom domain. Once submitted, custom domains cannot be changed without contacting support, so it is critical that you follow these instructions. Though we’ll always do our best to work through any issues you may face, PathPro is not responsible for delays that may occur based on improperly setting A NAME values.
Step 1: Locate your host’s DNS settings section #
In order for your custom domain to work, you’ll need to add the following entries to the hosting account that is hosting the site where you’d like the domain to point to. For example, if your site is www.mydomain.com, you’ll need to login to that website’s hosting service and locate the DNS settings. Note: the method of updating DNS values are different for every hosting service, so be sure to consult your hosting company’s documentation for instructions on accessing your site’s DNS settings.
Documentation on accessing DNS settings for popular hosting companies:
Bluehost
Digital Ocean
Godaddy
Namecheap
WP Engine
Step 2: Update your host’s DNS settings section with 2 A Record Entries #
Once you’ve located your host’s DNS records for the site you’re looking to host your project on, you’ll add the following 2 A record entries (otherwise known as address records):
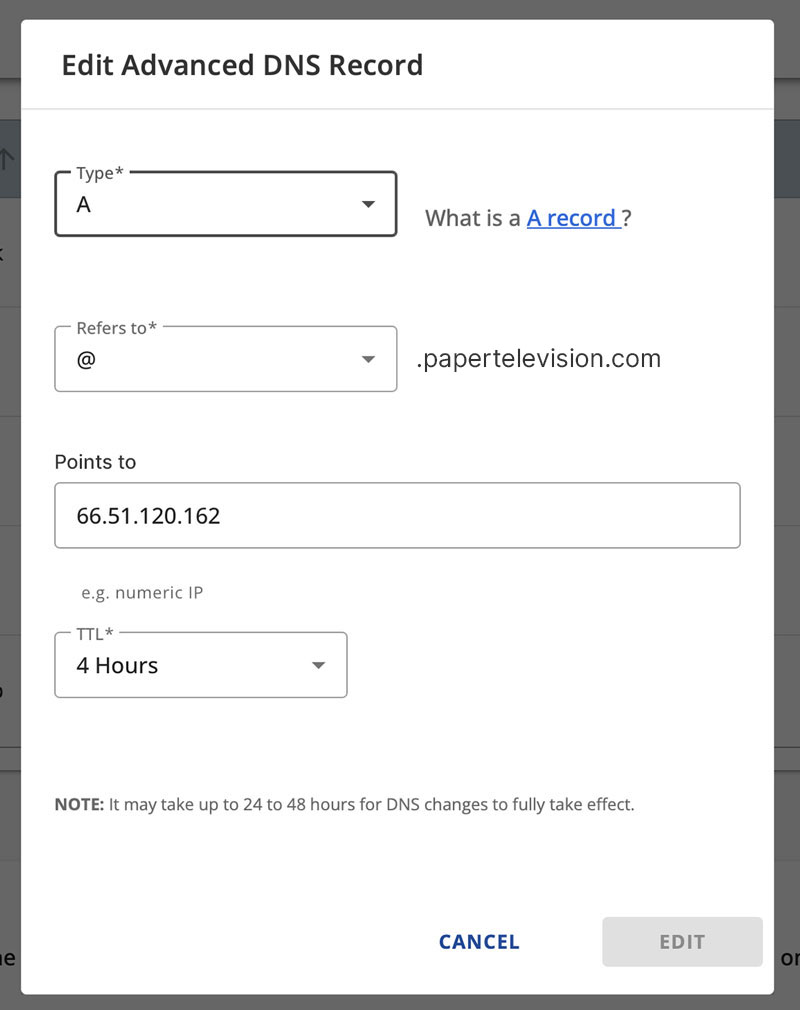
DNS Entry 1:
Type: A Record
Refers to: @ [.yourdomain.com]
Points to: 66.51.120.162
TTL: 4 hours
The first entry will look something like this:

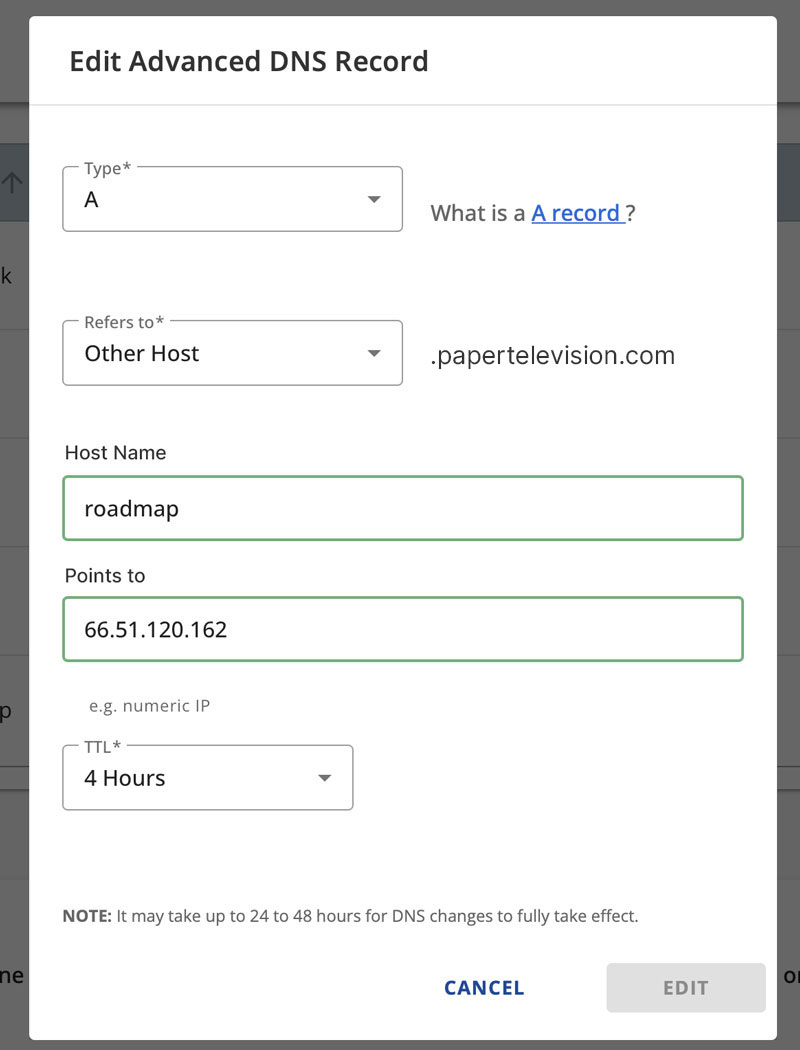
DNS Entry 2:
Type: A Record
Refers to: Other Host [.yourdomain.com]
Host Name: roadmap*
Points to: 66.51.120.162
TTL: 4 hours
*This is where you’ll enter any custom domain labels you’d like. For example if you’d like your custom domain to be “feedback.mydomain.com” the value you would enter in this field is “feedback”.
Note: Your full domain MUST match the domain that you plan to submit in the settings area of your admin. In our example, we are setting up a custom domain for a site titled papertelevision.com, so the full custom domino will be titled “roadmap.papertelevision.com”.
The second entry will look something like this:

Using the above information, you should have no issues correctly updating your DNS records. After those are in place and you’ve 100 confirmed they are correct, you’re ready to move on to the next step. For more info on setting your DNS records for various hosting services, please see below.
Step 3: Locate the Custom Domain Settings #
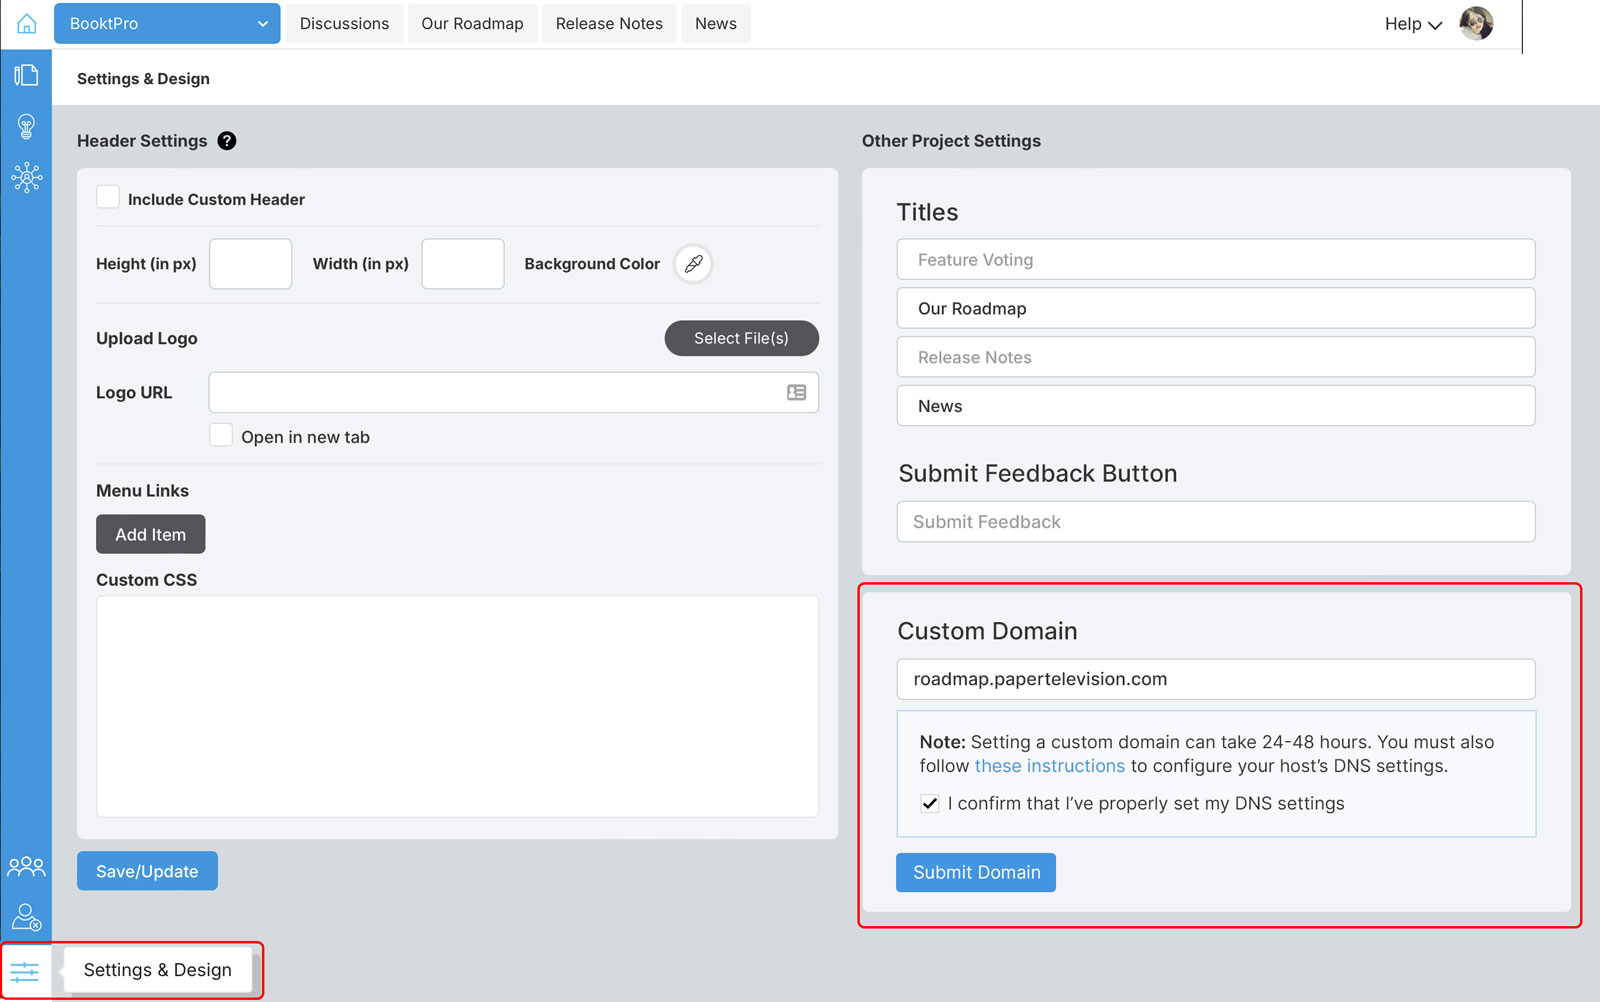
After you are 100% positive that you’ve properly set your DNS entries as outlined above, you’ll then be ready to set your custom domain. First, navigate to your account’s settings, and be sure to select the project that you’d like to edit in the top left dropdown. The settings icon is located in the lower left portion of the admin area, as shown below:

After accessing this page, you’ll then locate the “Custom Domain” section in the right column, as shown above. It’s time to submit your custom domain!
Step 4: Submit Your Custom Domain: #
Specifying a custom domain is easy: Simply enter your desired domain in the field. Simple, yes, but keep in mind that it is critical that you are 100% sure this is the correct custom domain, that you’ve entered it correctly, and that you’ve set the DNS entries accordingly in this domain’s host settings. Note: don’t worry about including the HTTPS, as the certification is taken care of on our side as part of the service. Noice!
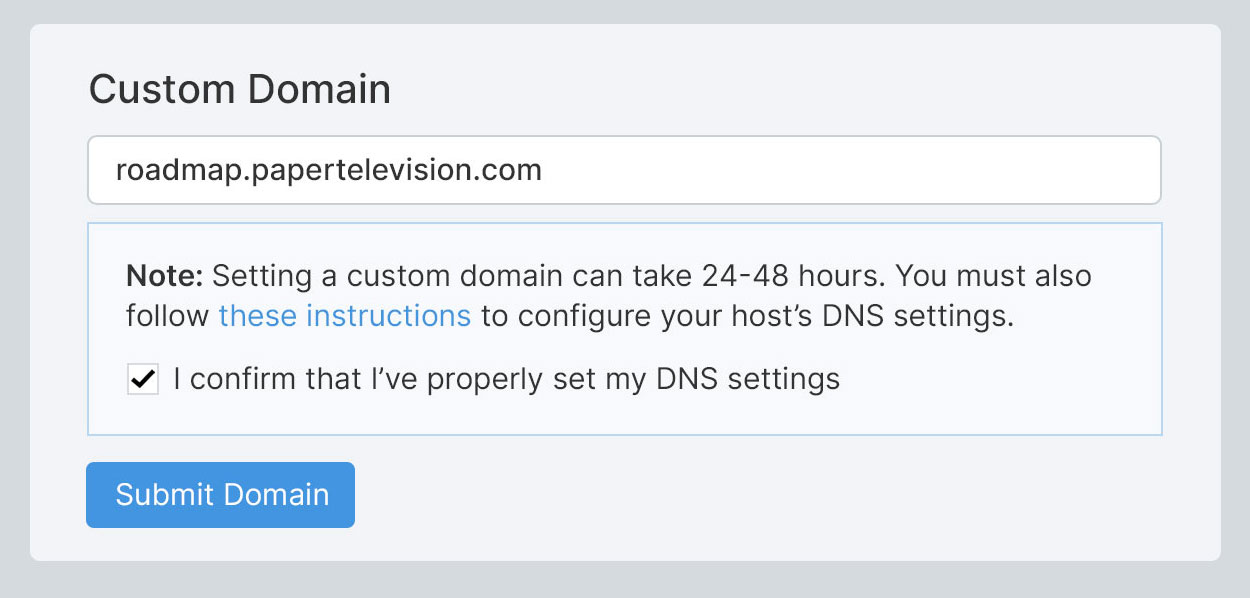
Let’s take a close look:

In this example, we’ve entered our custom domain, and we’ve confirmed that we’ve properly configured this domain’s DNS/CNAME settings as instructed in the first portion of this article. As for the formatting of your custom domain, it can essentially be anything you like, so long as it contains the root domain of the site you’re hoping to host the domain on. For example, if you own the site “www.papertelevision.com” then you may wish to use a custom domain like: “roadmap.papertelevision.com” as we did in our example above.
Once you’re happy with your custom domain, simply click the “Submit Domain” button, and our system will begin the process of linking your custom domain to the selected project. Note this can take up to 24-48 hours to propagate the custom domain, and we’ll send you an email once it’s live and in place.
What else should I know about custom domains? #
Custom domains are a very complicated function with many layers of complexity needed to truly white-label a project. Due to this complexity, using a custom domain will come with a few restrictions, as listed below:
- Do to the complexity in the nature of custom domains, you may only submit and configure 1 custom domain per project. Though we will try our best to help if issues arise, additional fees may apply when setting up additional or revised domains once a custom domain had been properly configured.
- Once a custom domain is in place, you can no longer change the title of a project. So, be sure you’ve named your project exactly what you want it to be before setting a custom domain!
Summary #
That covers it for the custom domains feature! Note that custom domains are included in our Pro and Ultimate plans, but if you’re interested in fully white-labeling your projects, feel free to check out our Ultimate plan.

