The Importance of Creating a Project #
Creating a Project is a critical first step in setting up your workspace. All things revolve around Projects, including Team Members, Community Members (customers), Roadmaps, Feature Voting, and so on. Without a project, you won’t be able to get started, so be sure to check out this article: Projects: An Overview.
After you’re familiar with how Projects work, it’s time to create your first Project, and, spoilers, it’s extremely easy to do so.
First Things First: Take the Product Tour #
Note: we HIGHLY suggest that you take the product tour when you first login to your PathPro account. You will see this option displayed automatically, but you can also take this tour anytime by clicking the “Help” dropdown at the top right of your admin area. There’s you’ll see the link to take the Feature Tour, as shown here:

At the end of this tour, you’ll be prompted to create your first project, which we of course suggest doing so right out of the gate.
Creating A New Project #
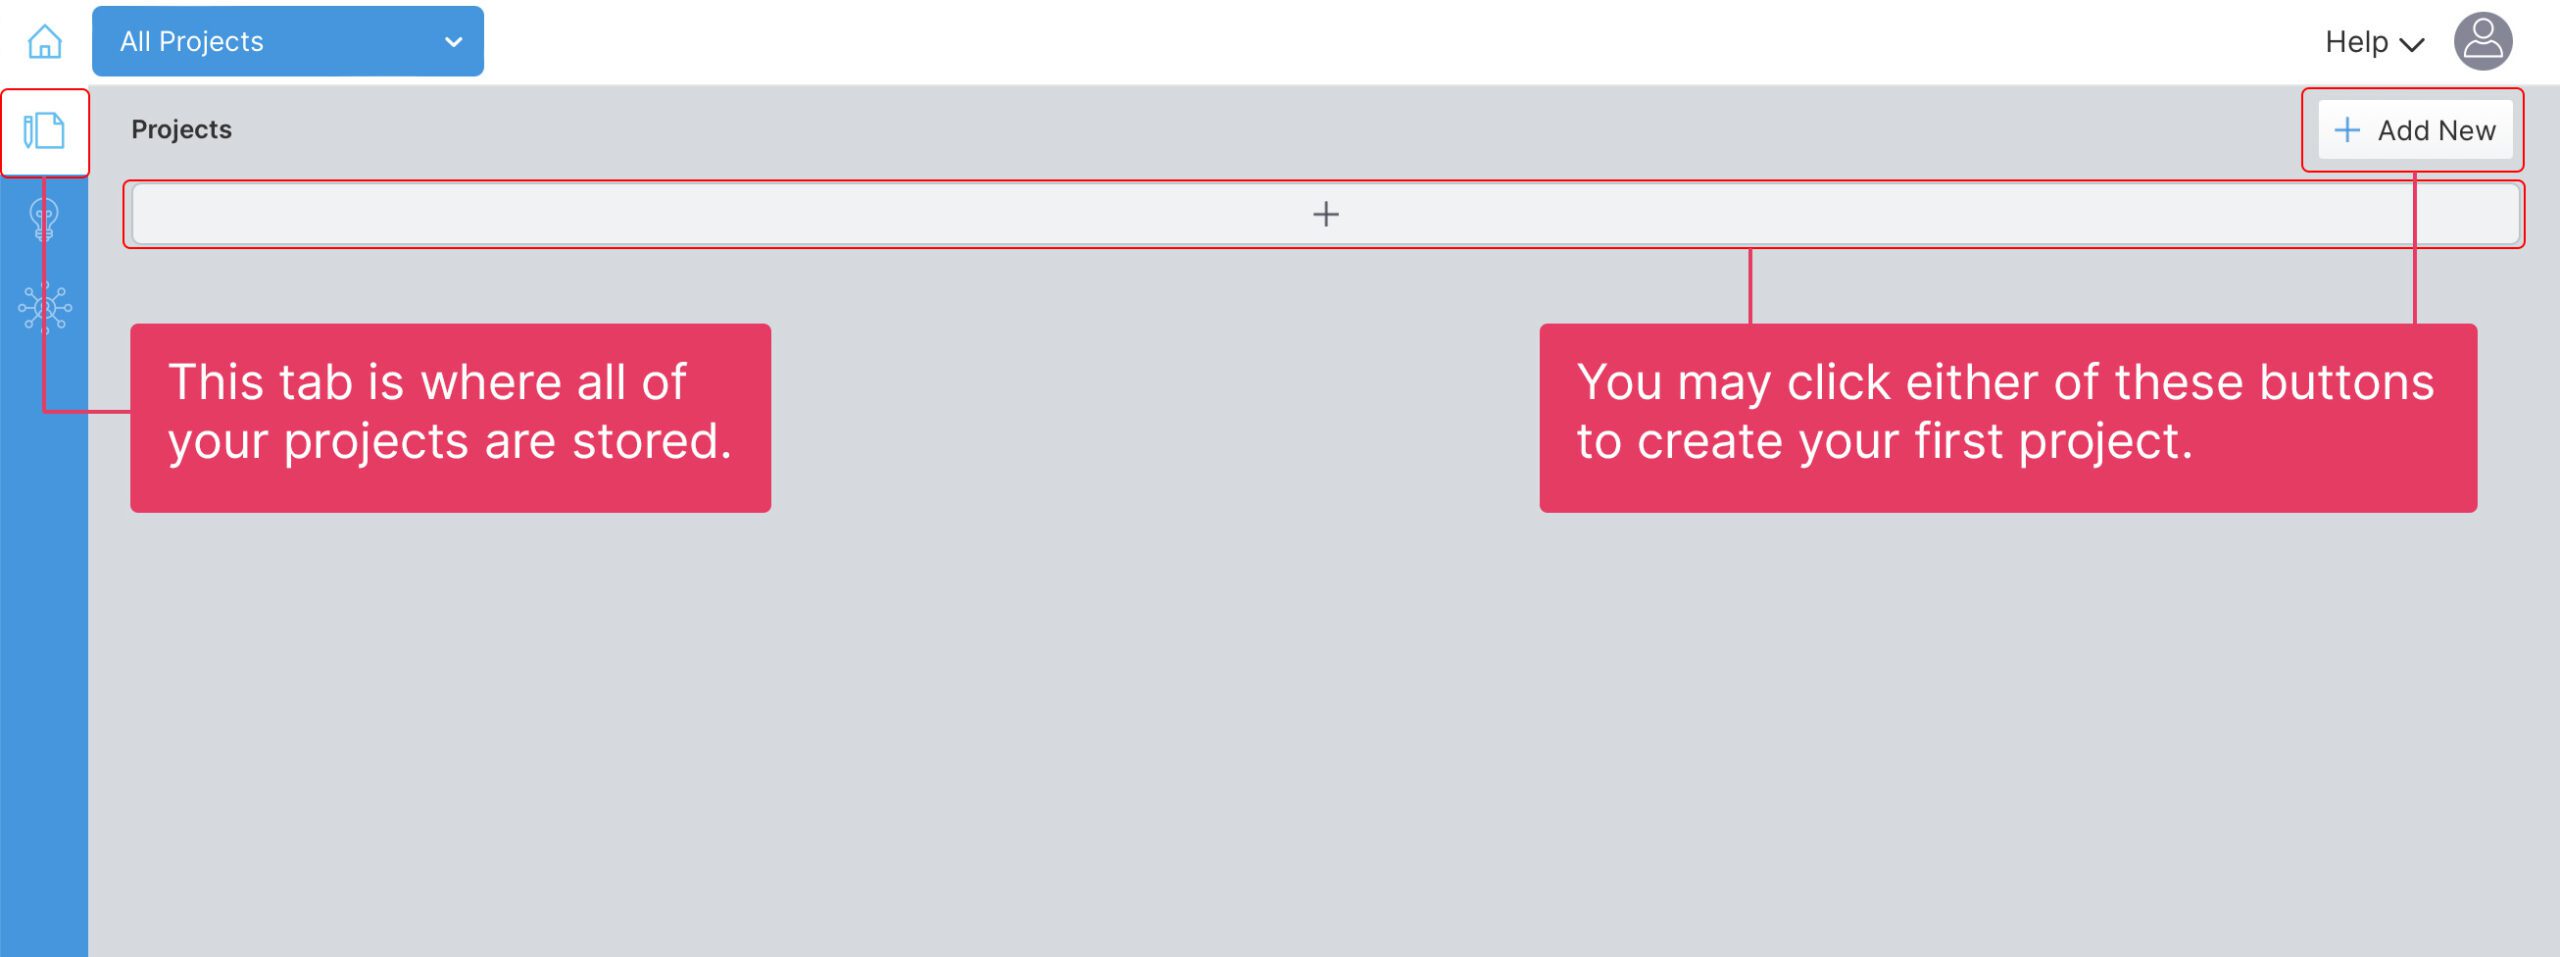
If you have skipped the tour, you can also create your first project by navigating to the Projects tab, and clicking either the “+” symbol seen there, or by clicking the “Add New” button in the top right:

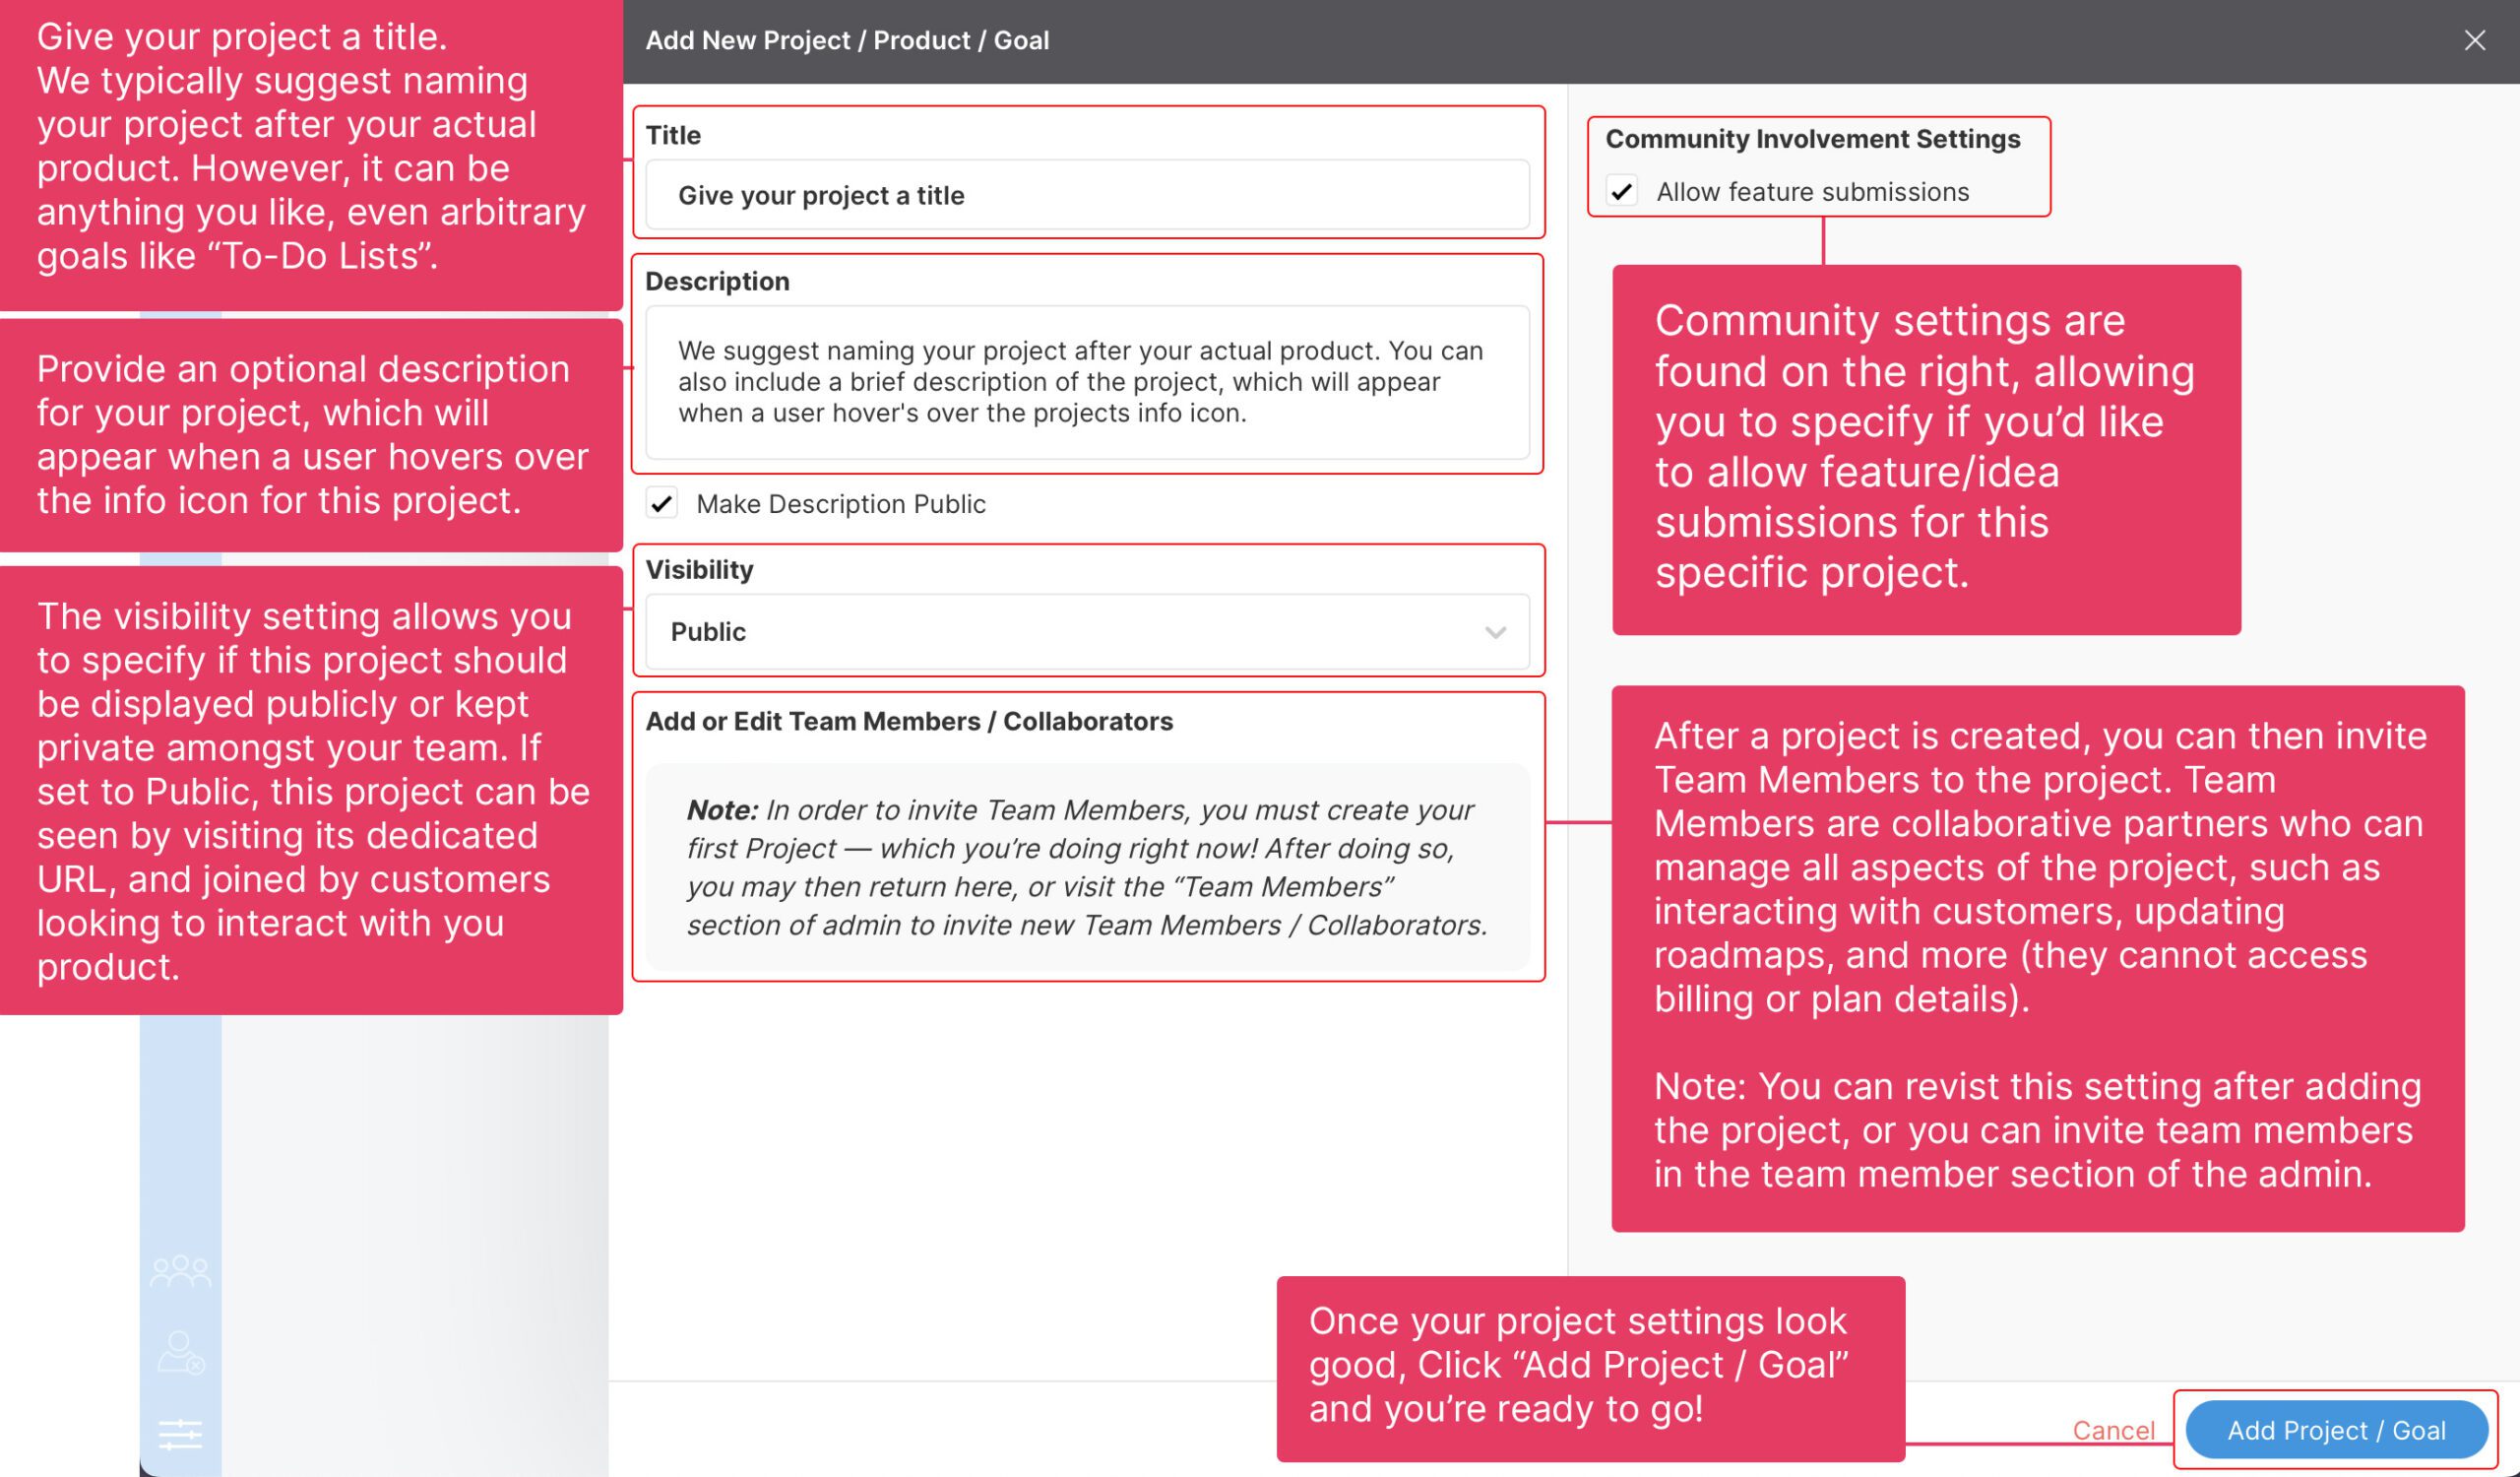
On clicking this option to create your first project, you’ll be greeted with the Project settings panel. This consists of a few key details about your project, which we’ve outlined below:

After You’ve created your project:
Now that you’ve created your first project, there are a few options that “unlock” in your admin panel, allowing you to truly dig in to the benefits of growing your product. These include:
Inviting team members
To invite a team member to a project, you can either click the project’s settings from the project panel, or you can go to the dedicated team member section of your admin panel. You can find out more about inviting Team Members here.
Managing Community Members
Once a project is live, your users, such as product customers and community members, can now join the project in order to submit feedback, upvote ideas, comment on tasks, and so on. You’ll also be able to review customer analytics and otherwise organize and review customer details in the Community Member section of your admin area. Find out more about the Community Members role here.
Put Features to the Vote!
Have some ideas for your product, or perhaps community members are starting to submit ideas? You can put them to the vote to gather feedback from other community members in the Feature Voting section of any given product. Find out how Feature voting works right this way.
Add a Custom Header
You can build a custom, stylized header to match the one on your website. This will help you seamlessly integrate PathPro directly on your site while mimicking the header found on your site. Find out more here.
Customize the Project’s Tabs / Labels
You can customize the tabs that appear on each project by navigating to the settings tab and selecting the project you’d like to edit from the top-left dropdown. This lets you change the labels used for each of PathPro’s core sections: Feature Voting, Roadmap, Release Notes, and Product News. Likewise, you can change the text that appears in the feedback submission button.
Add a Custom Domain
This is a huge feature that lets you further “white-label” any given project. This will remove any mention of PathPro in the URL, and can include your PathPro project entirely within the domain of your choosing. Find out more here.
Banning Community Members
Well, not to get negative but sometimes there’s a need to ban community members from your project. While those members will continue to have an account, they won’t be able to access any project they’ve been banned from. Find out more about banning community members here.
Summary #
Congrats on setting up your first project! As mentioned, the PathPro ecosystem revolves around your projects, so now that you’ve created one, it’s time to really dig in. We recommend you start by creating your first Task Group to start building your product’s Roadmap.

